I am so excited to share our new open shelving project in our kitchen, after about three years of thinking about it, and three weeks of working on it, it is finished! And we love it!
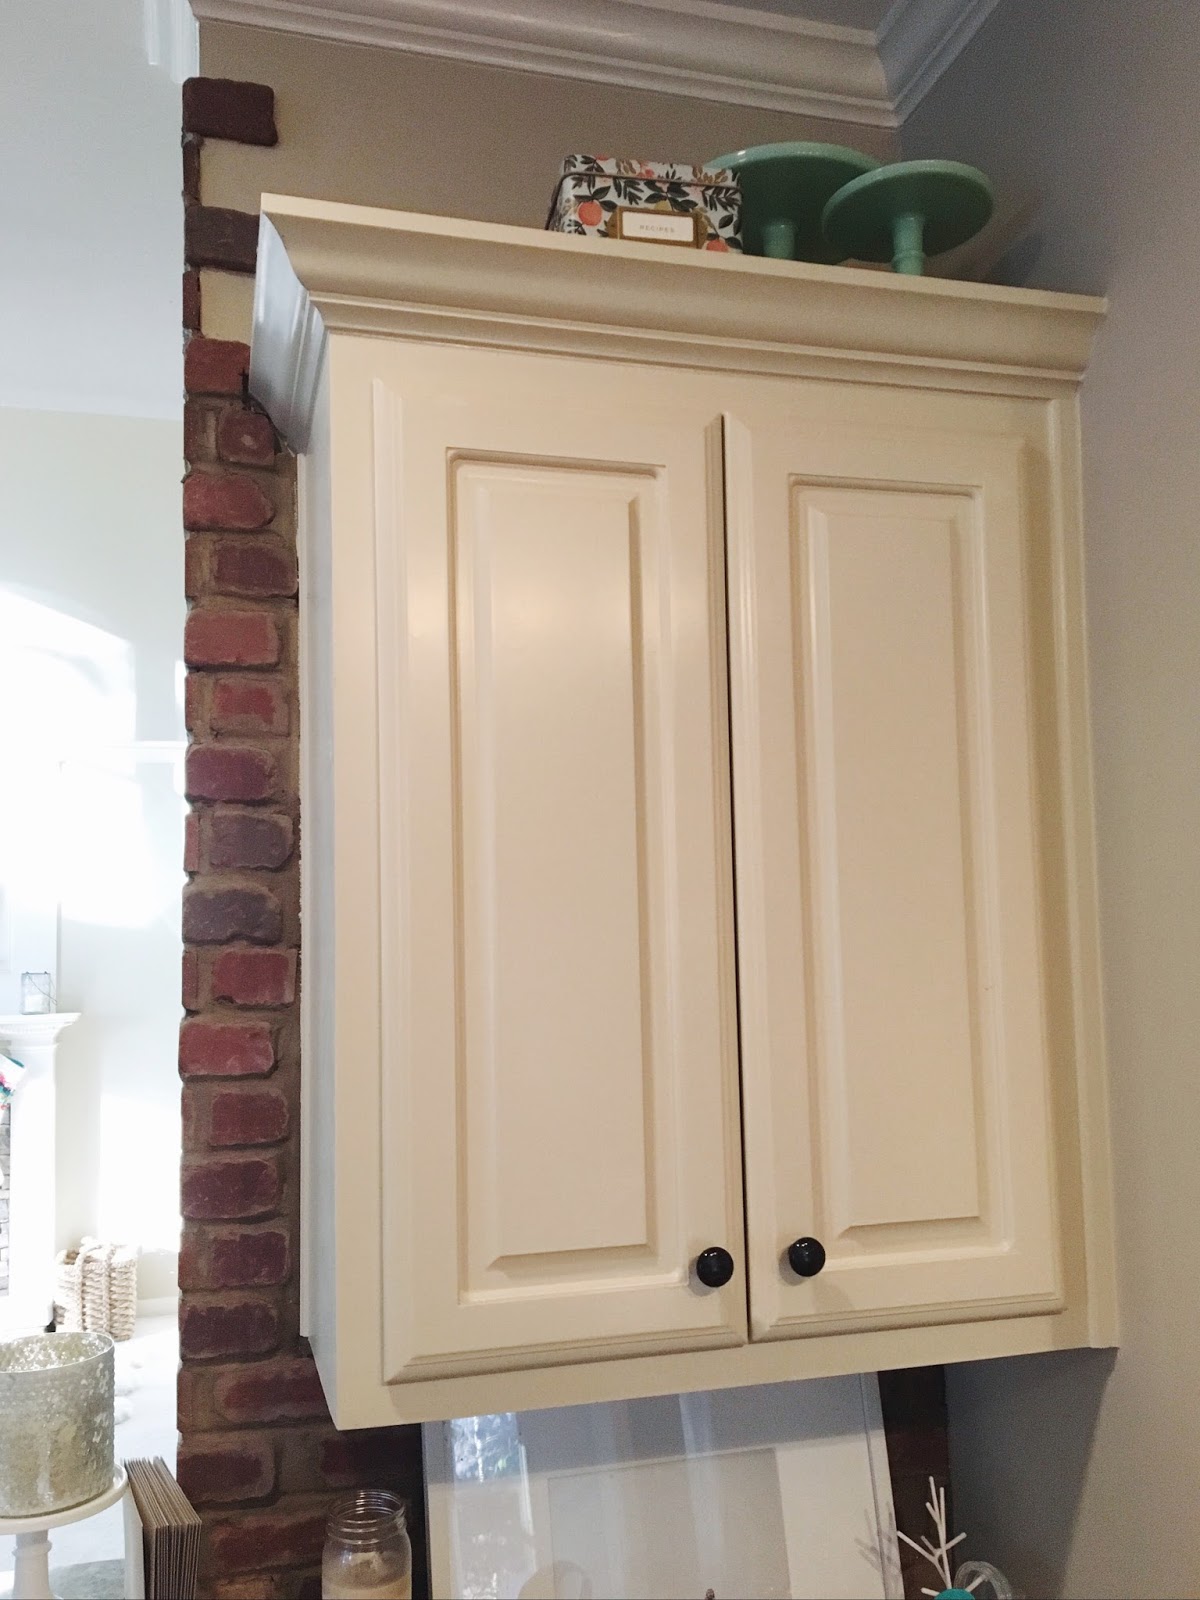
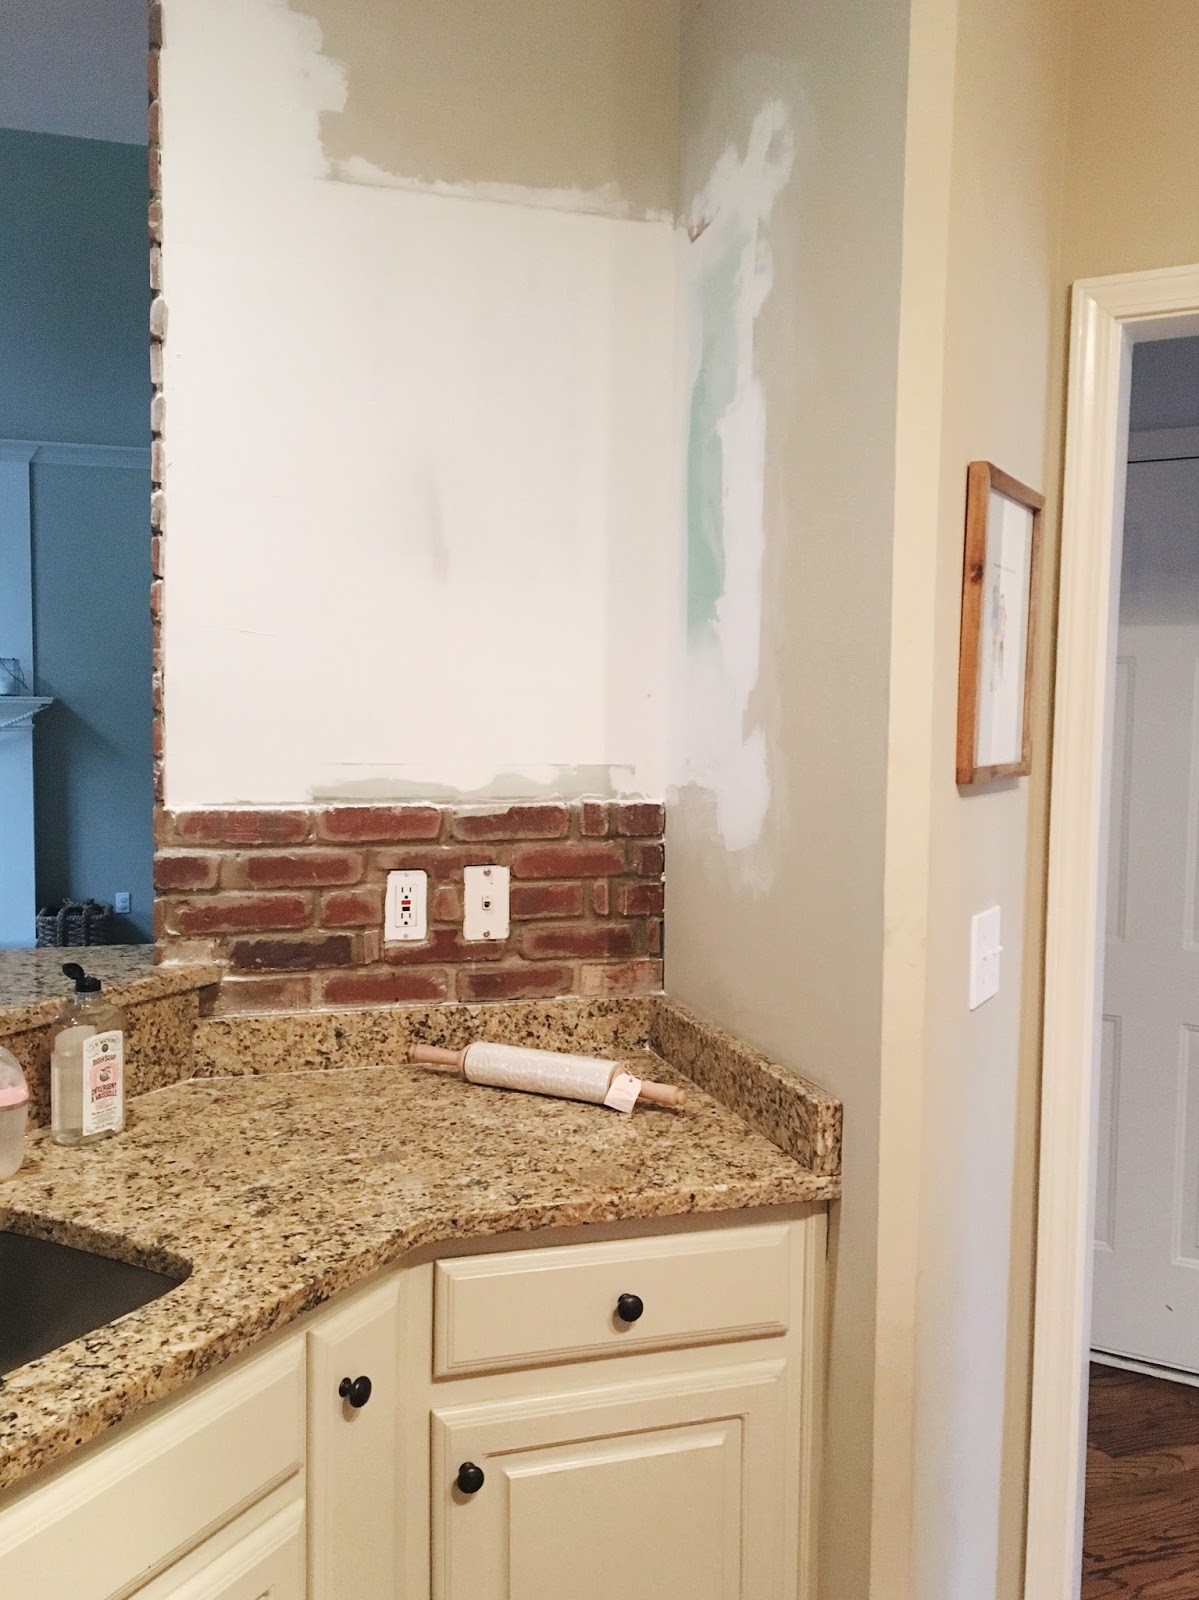
I thought I would share a little bit about the process in case any of you were considering doing something similar. We started by pulling down the existing cabinet that was on the wall, which was a little harder than we expected, but it came down without too much damage to the wall. Next, we worked on removing the bricks on the left side of the wall. The brick is real, although it is just a partial brick, so it is about 1/2 inch thick. We had to cut through the brick using a metal cutting wheel attached to a dremmel, which required quite a bit of drywall work afterwards to smooth out the surface. My dad was the plaster master & it turned out great!

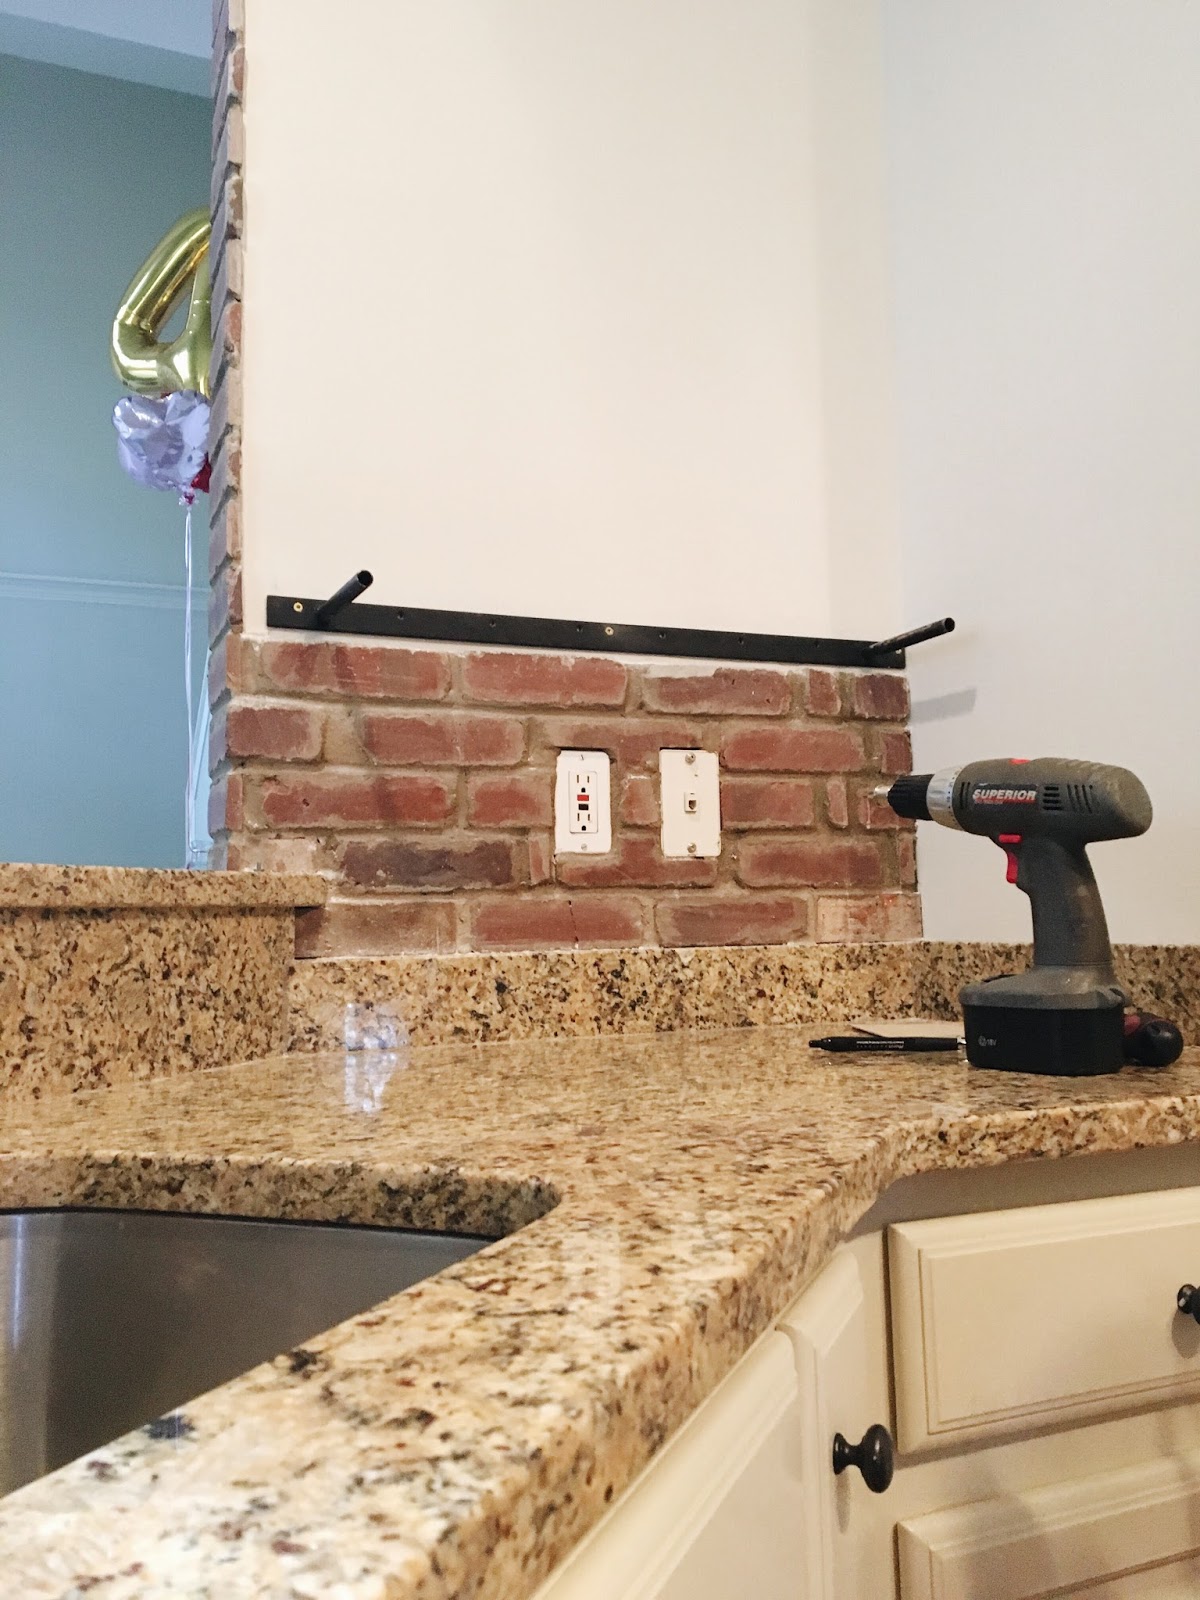
We found our floating shelf brackets on Etsy, the sizes were completely customizable & the amount of weight they hold was well over what we needed. We were thinking of using raw cedar for the shelves but went with pine instead, since it was easier to get in the size that we needed, we used 2x10s. We had a custom stain made at Sherwin Williams that complimented the color of our floors, but just a bit lighter. Once the holes were drilled in the back of the wood, the shelves were assembled enough that we could hold them up in the space and level them. Then we marked the wall with a pencil to where the brackets should be (since drilling into the wood was not exactly level, the brackets had to compensate for that in order for the overall shelf to be straight). Hanging them was pretty seamless, we were pleasantly surprised! 🙂 I can’t wait to finish accessorizing them now, I just threw a few of my favorite things up, while waiting for my new Gatherware bowls to arrive that I am super excited about! I may also find (or make!) some fun artwork to prop up as well.

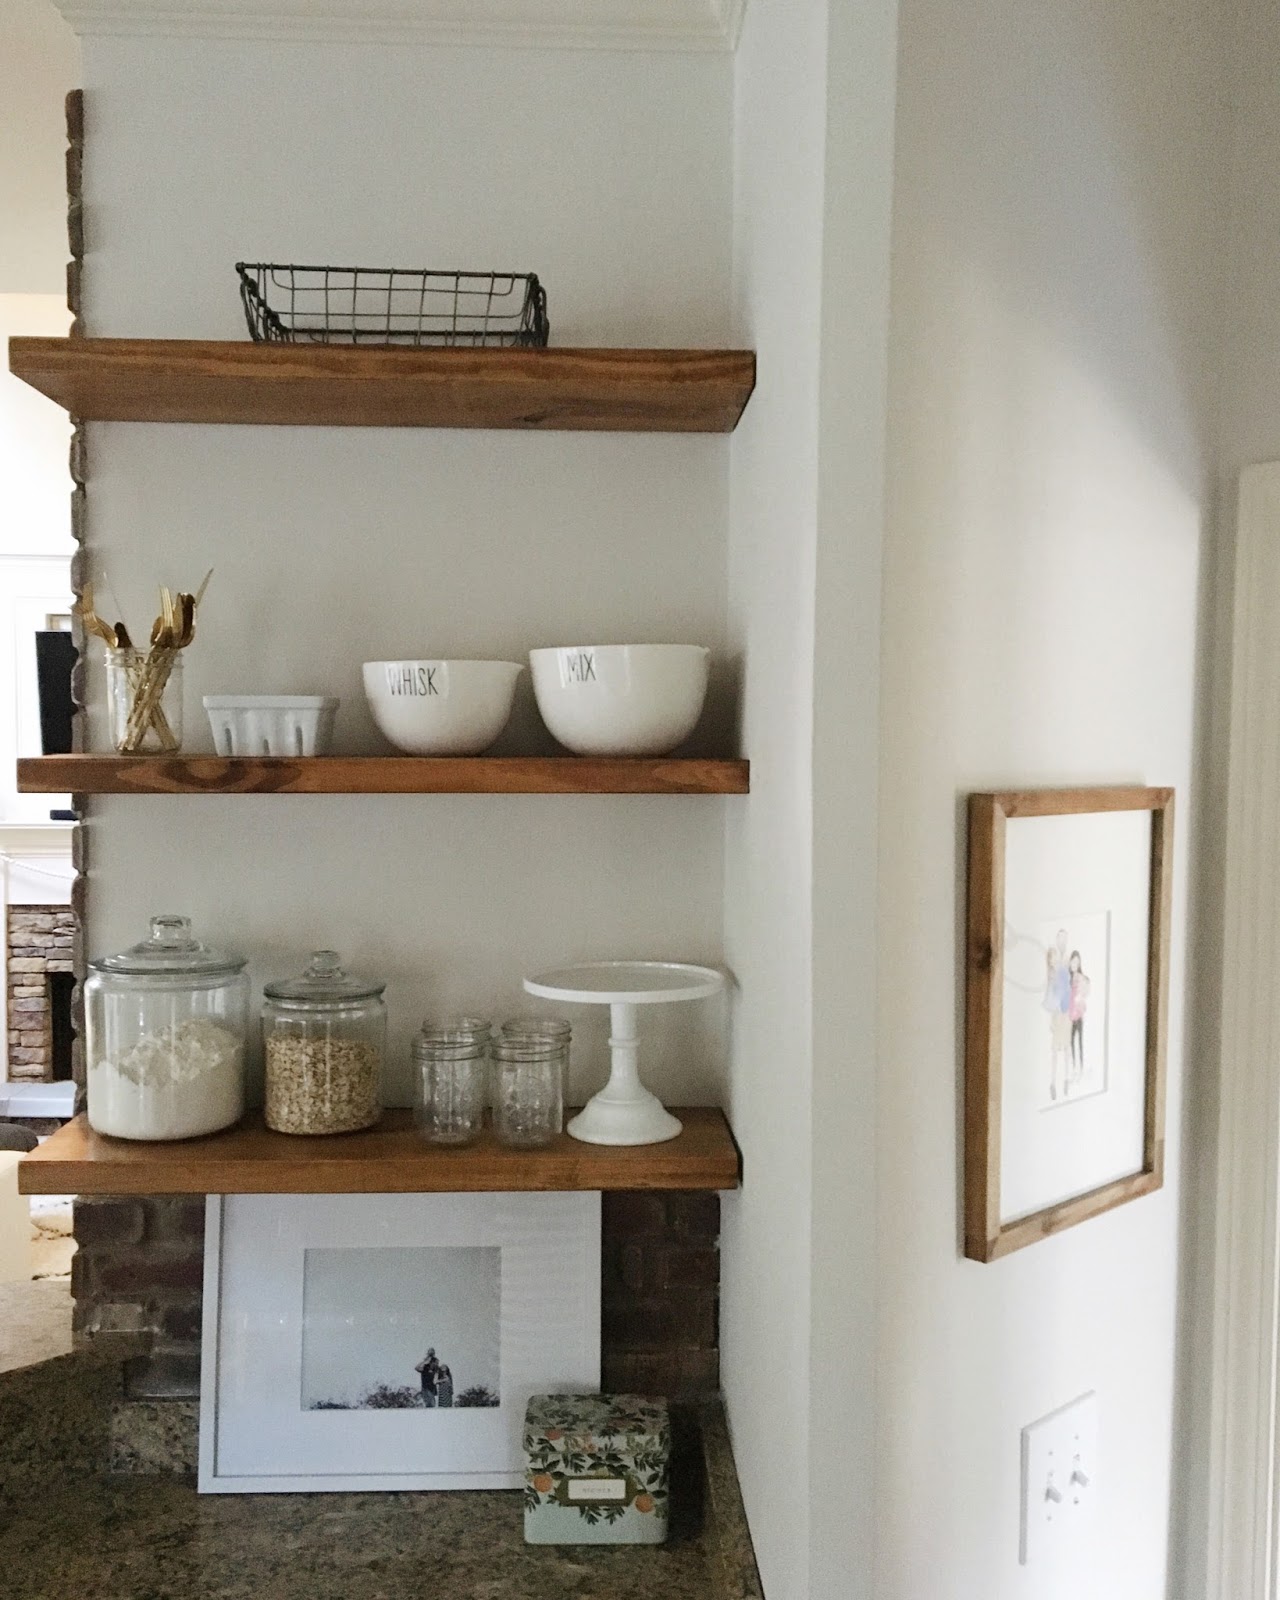
This was such a fun project for us, it wasn’t terribly hard to pull off (although my husband might disagree after all of his crazy measuring, drilling & work to make sure they all fit just right) but we are so happy with the results! And I am so thankful for all of his hard work!! 🙂 It gives our kitchen a much more custom look & it’s going to be so fun to display festive things on the shelves over the holidays!
Hope you find a little inspiration to take away! XO
42
Hope you find a little inspiration to take away! XO
They look fantastic, well done x
I love how it came out and I love your home decor/DIY posts! Your shelves look awesome! Thanks for the inspiration 🙂
gorgeous! love the rustic wood!
I've been anticipating the reveal and you did not disappoint ! 😉 it looks AMAZING! Just perfect! Good job! ❤️❤️
Looks gorgeous! I can't believe the difference it makes with having it open. I wish we could do that but we have such little cabinet space we would have no place to put our dishes but this is definitely gorgeous and an upgrade.
liz @ j for joiner
The shelves look incredible, great job you guys! Your home decor posts are my favorite!
Looks great, love the styling too!
I want to be you when I grow up! lol! but seriously I wish we were friends, so you could teach me your ways! I have one 18 mo old daughter and she alone wears me out! you go momma!
The shelving looks great! And those gatherware bowls look super fun!
Lindsey
http://www.careerintherearviewmirror.blogspot.com
Love this! Totally swoon-worthy. We're working on styling some open shelves in our kitchen and I've been on the hunt for some of my favorite looks!
http://lessthanaverageheight.com/
I'm so inspired do try something like this in our kitchen! It came out beautiful!!!! Really cool space to display things that may otherwise crowd a countertop or get hidden in the pantry.
Oh yes, this is beautiful! Way better than the cabinet! Thanks for sharing the process. We, too, have an odd loner cabinet above our dishwasher and I think some open shelving would look amazing there!
Wow that looks WAY better. I've never really thought much about open shelving. Very easy diy and opens so much space! Plus, I'm not a fan of the "floating cabinet" look. haha
I love it, It looks great!
I love how you styled your shelves!
Justine @ Charm City Ciemny's
http://www.lifeasabaltimoregirl.blogspot.com
I love the new look!
Awesome job!! Love how it turned out!
Oh my goodness, this may be the answer to my bathroom shelving dilemma!! Looks fantastic!
http://www.aliciaseveryday.blogspot.ca
I love it! I was just talking to my husband last night about it! Did you just do the one section?
I forgot to mention, have you thought of replacing the outlet and phone jack covers with gold ones? Or the bronze ones like your faucet? We did stainless steel ones for the light switch covers downstairs and it's something small but a nice detail!
They look so so good!! I really love them. 🙂
Definitely looks fantastic. All the pictures of your house look amazing. You're a great decorator.
Love this! I'm wanting to do something similar in our kitchen. Where did you get the wood shelves from? Love the color of the stain?
They look great! I love seeing your home diy projects!
Looks great! If you don't mind me asking where did you get both the picture frames in the second to last picture? Thanks so much. Love your blog 🙂
Shelves look AAAA-MAZING! But, I was wondering if you would share where you got the reclaimed wood looking picture frame on the right wall. I've been hunting these lately with no luck.
I think it looks beautiful! Completely love it. I don't know if I could give up all the cabinet space though, and I would miss the functionality of shoving all my junk in he cabinet haha.
I LOVE it!! It looks like it belongs in an HGTV magazine. 🙂 Great job!
These look beautiful! Great inspiration – you make it sound pretty easy 🙂
Becky | accoohtrements life, travel & design blog
Thank you so much for sharing this great blog, its been a really very helpful read! I am very thankful to the you for giving this interesting post.I think this is a great innovation.Fredrickson
This is exactly what I need. I really like and appreciated your work. I read deeply your article, the points you have mentioned in this article are useful.Will you tell me how I too can participate in that?
Love this Wall Decor Shelves! I'm like you, I wouldn't put the vintage ones up, either. Thanks for the idea.
Really nice! Thanks for sharing..
Home decor