Garvin & Co

Motherhood, Lifestyle & Design Blog by Jessica Garvin

  • Shop
  • Living
  • Style
  • Wellness
  • Festive
  • About
  • Contact

Explore

  • Shop
  • Wellness
  • About
  • Contact

Connect

House & Home · May 31, 2016

DIY Copper Planters

A few weeks ago, I spied these little copper beauties that I couldn’t help but imagine would make the coolest planters ever. Turns out, they were trash cans, but at only $15, I had to have them. I brought them home to Brandon, and we decided they needed doctored up a bit. I was inspired by these West Elm planters that are so so beautiful, and hoped that we could DIY these into something similar. The total cost for each planter was only around $20!
I’m sooo excited about how they turned out!! Brandon might be a bit worried about how much I love them because that just means more wood working projects in his future! 😉
Tools Required // Table Saw or Router and circular saw or miter saw, Drill, Drill Bits & Screws, 2 – 8′ 2x4s (cedar preferably for outdoor use), Copper Planter

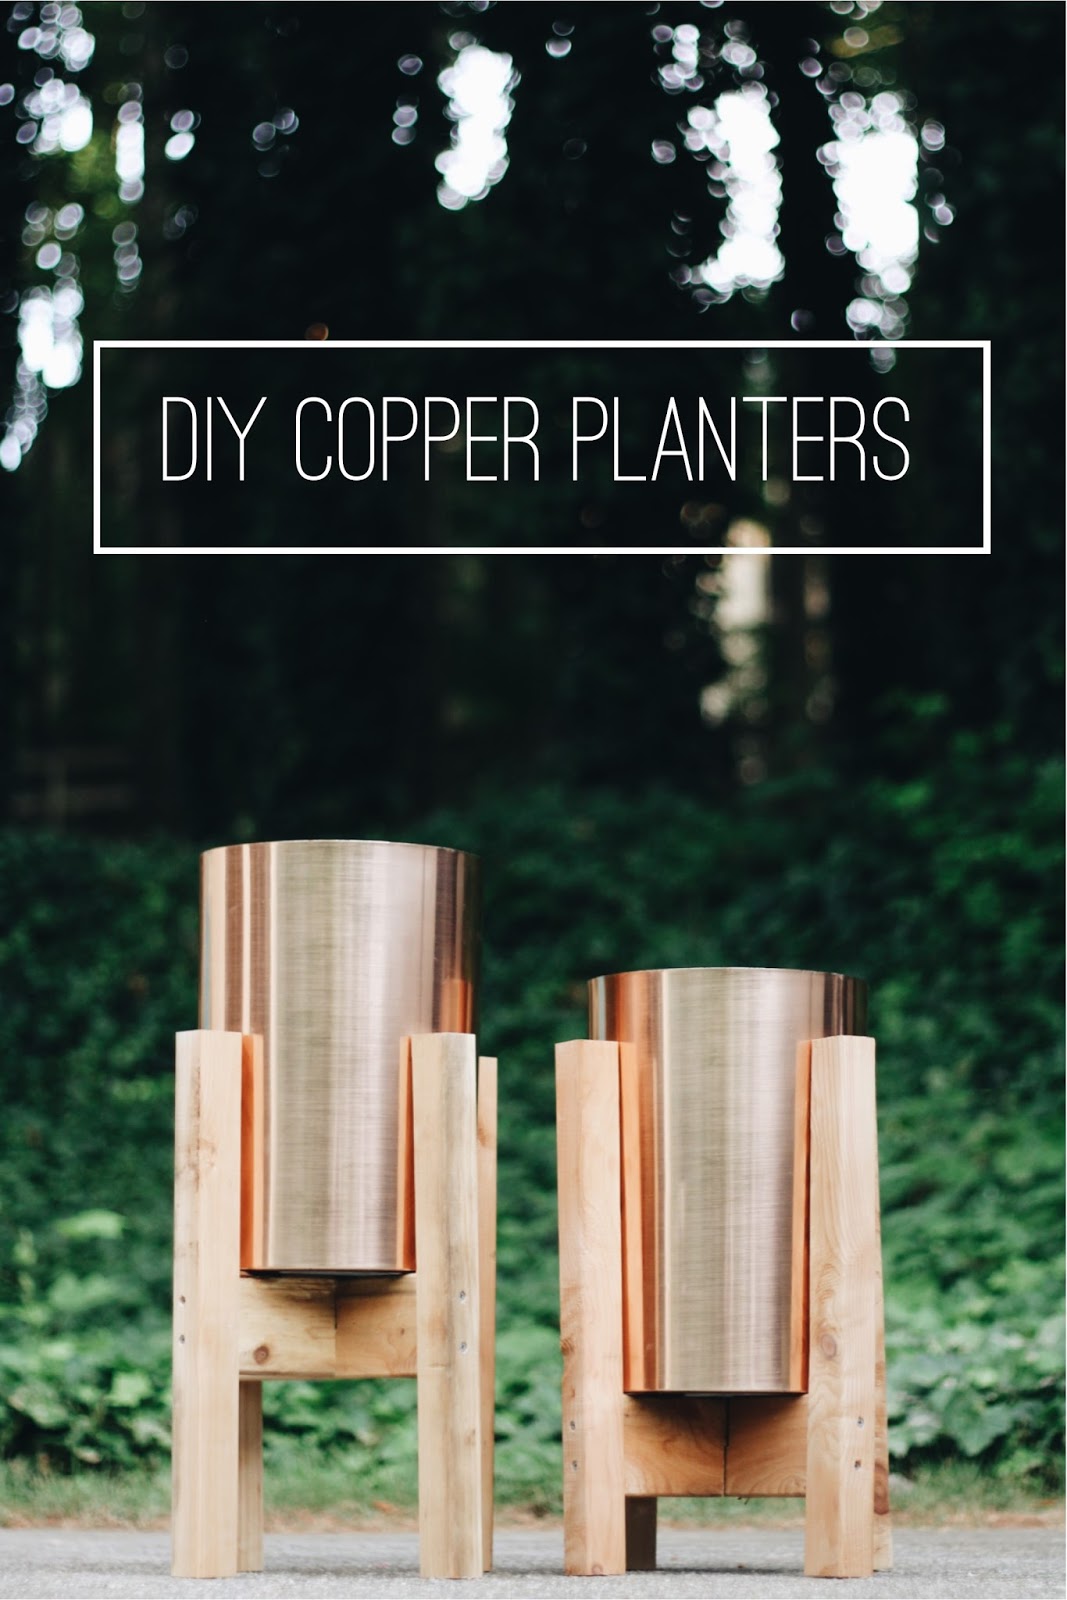
Steps // 1. Cut the 2×4 into four 18” pieces and two 10” pieces (NOTE: the 10” measurement is based on the circumference of our planter going into this stand, so your measurements will change if you use a different size planter)
2. Rip the four 18” boards in half vertically (hot dog style). Note that this is not necessary depending on the boards you buy or you could just have a chunkier style of planter, we wanted our legs to be skinnier with the wood we already had.
3. Take the four 10” boards, and measure 4 1/4” from each side, which will leave you with a 1 1/2” notch to cut out. You can either use atable saw (by setting the blade height to cut halfway through the board, 1 3/4 inches here) or router out the notches. Dealers choice 😉
4. Hand-fit the 10” support boards to fit nicely (each 2×4 is a bit different, so you may need to widen the gap a bit).

Assembly // 1. Lay the 18” boards on their side and pre-drill holes from the boards into the 10” support boards. The shorter stand has the top of the support board 6” from the ground, the taller stand has it 10” from the ground, but it is up to you how tall you want your planter to be!
2. Be sure to put the ripped side of the board inward where they will connect to the supports.
3. Put 2 screws into the board to support it, flip and repeat the process to connect the other leg.
4. To make the other leg of the stand, make sure the notch is opposite so that the two sets of legs will fit into each other. (One top notch, one bottom notch)
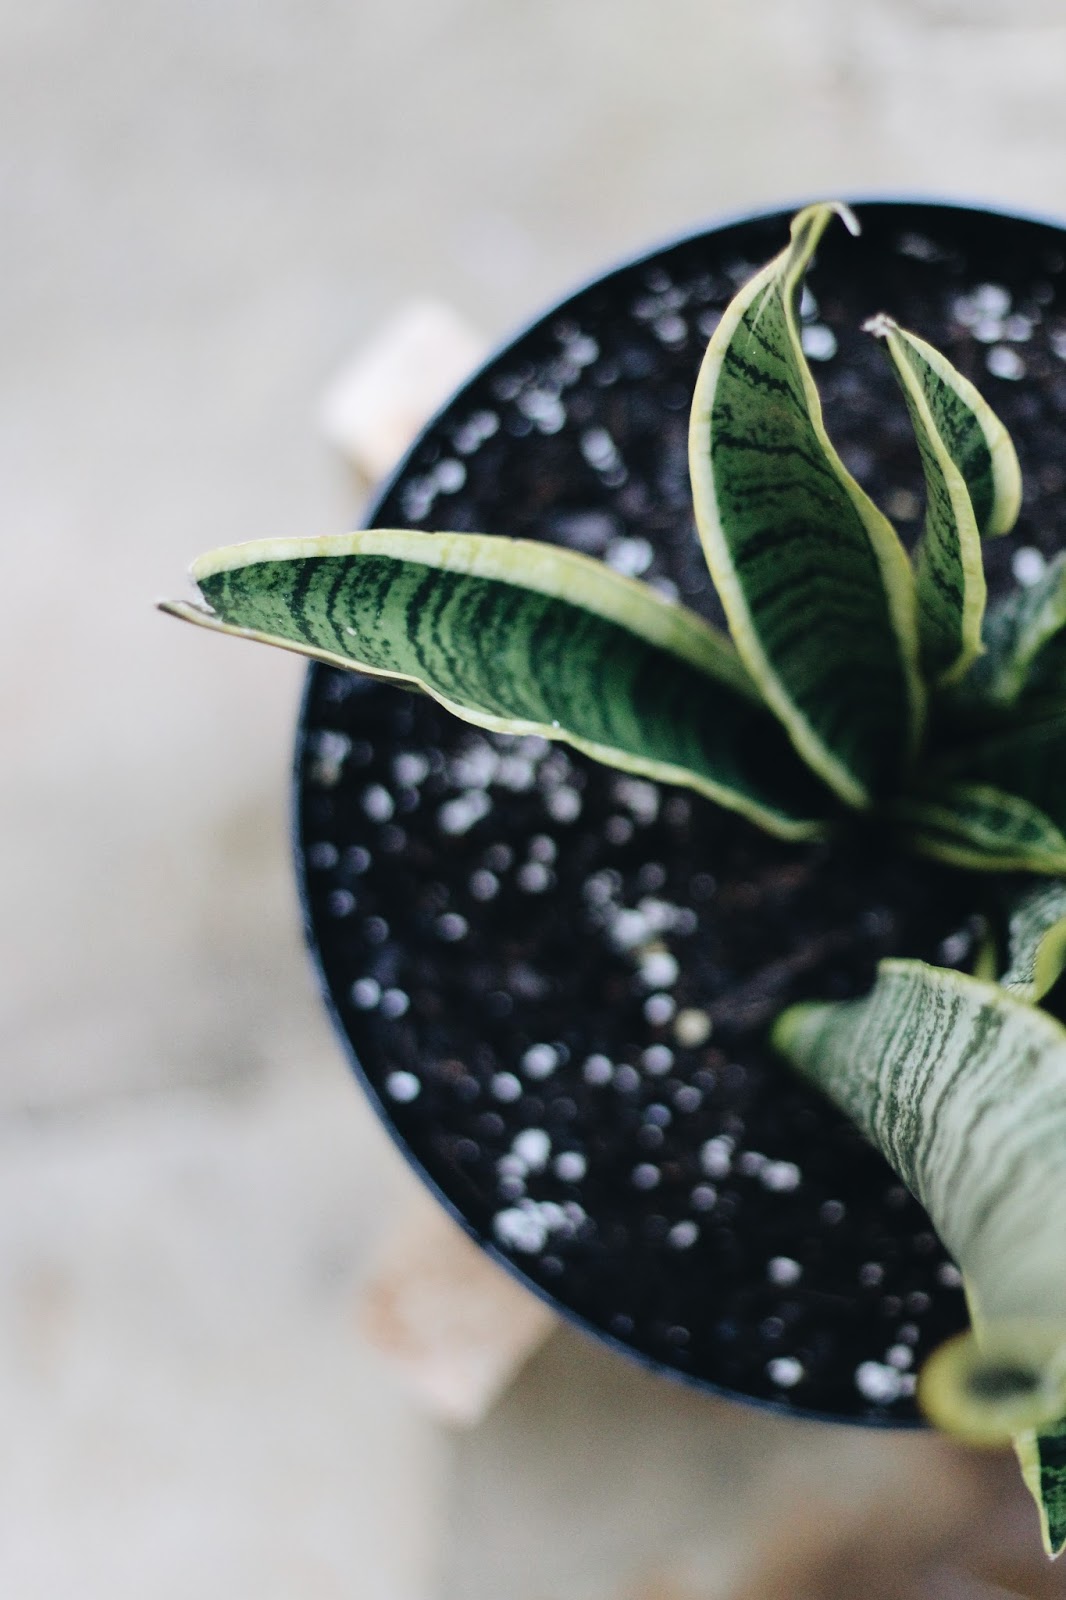
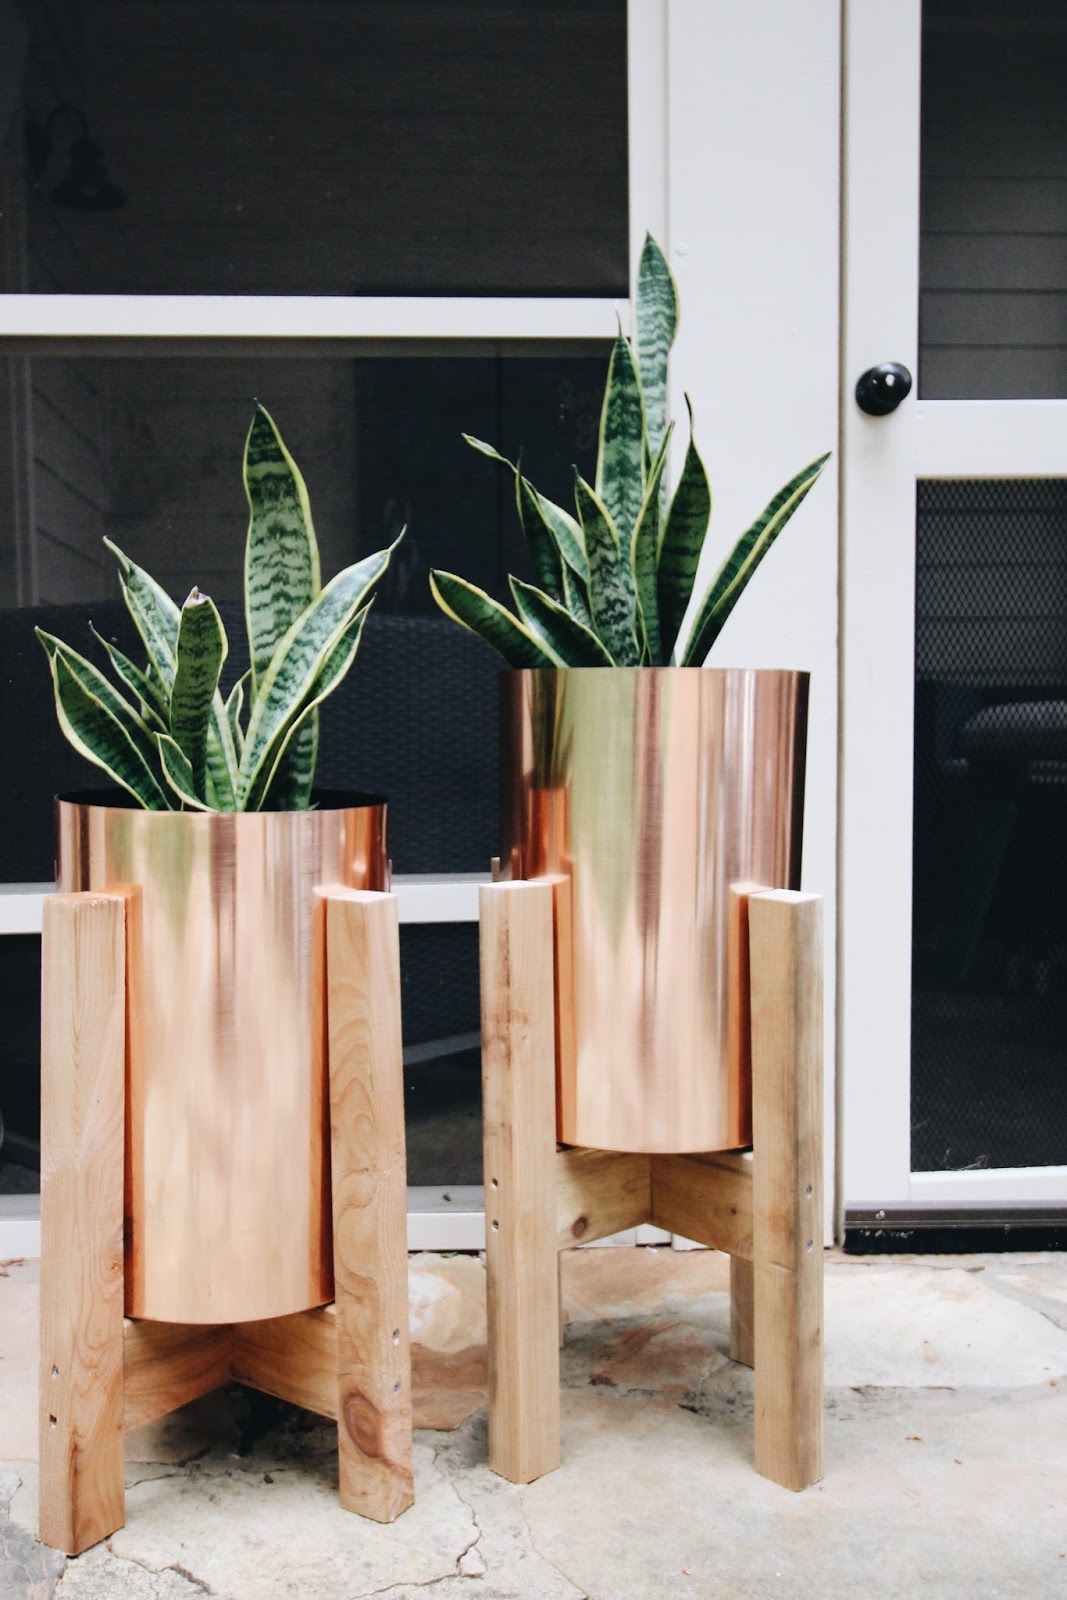
 5. Add two small holes in the bottom of your planter with a drill to allow for water drainage. I’m not sure if this is necessary with every kind of plant, we actually didn’t do it for these because they don’t require much watering.


Not mentioned in diagram: super cute sandals that are totally impractical for woodworking 😉

You can screw the legs together at the notch to make the planter one piece, but keeping them independently gives greater flexibility for non-level ground. You can decide to stain or coat with an outdoor sealant. If outdoor, use SPAR varnish which must be applied outdoor, in very well ventilated area.

And there you have it! Drop your copper planter into your new stand, and make a new home for your favorite plants!!


These planters are part of a mini patio refresh that we have been working on & I can’t wait to share more! Outdoor space is everything to us right now, and since we don’t have a lot of it, we have to make the most of it! 😉 
Hope you all had an amazing three day weekend. XO
217

Posted By: Jessica Garvin · In: House & Home

Summer Starts Here
Style // Six Summer Sandals

You’ll Also Love

Exciting News!
Harper’s Bedroom
Winter Favorites for the Home

Comments

  1. Kaitlin says

    June 1, 2016 at 6:45 pm

    These are so good, must make!

    Reply
  2. Alicia's Everyday says

    June 1, 2016 at 6:45 pm

    These are gorgeous – I'm loving the copper!! I can pretend to be ambitious and say I'm going to make these BUT I will just admire your handy work instead 😉 Haha.

    http://www.aliciaseveryday.blogspot.ca

    Reply
  3. Maddie and Steve says

    June 1, 2016 at 6:45 pm

    Amazing planters! I will attempt to make it too! Thanks for sharing!

    Reply
  4. Brittney says

    June 1, 2016 at 6:45 pm

    Oh my goodness! I love the planters (and the sandals!) When I saw them on Instagram, I was sure that you had got them from West Elm.

    Reply
  5. Emily at 'a little bit of Emily' says

    June 1, 2016 at 6:45 pm

    Those planters turned out so well – what a great idea!

    Reply
  6. Shadia Brown says

    June 1, 2016 at 6:45 pm

    I actually like your much better than your inspo! Great job!!

    Reply
  7. Jessica says

    June 1, 2016 at 6:46 pm

    Ahh, thank you!!

    Reply
  8. Jessica says

    June 1, 2016 at 6:46 pm

    Thank you Emily!

    Reply
  9. Jessica says

    June 1, 2016 at 6:47 pm

    So sweet of you, thank you!

    Reply
  10. Liz Trimble says

    June 2, 2016 at 6:09 pm

    Nice work!! Yours are way cuter than the ones from West Elm!

    Reply
  11. Carolina Menzel-Jones says

    June 2, 2016 at 6:09 pm

    You are so creative! Love you sandals too!
    xo
    Carolina | http://www.dearbabymj.com

    Reply
  12. Anna Liesemeyer says

    June 13, 2016 at 7:00 pm

    These turned out freakin amazing!!!

    Reply
  13. Unknown says

    June 16, 2016 at 3:06 pm

    I am so obsessed with these! can you just make me some? 😉

    Reply
  14. Lexi says

    June 20, 2016 at 7:57 pm

    These are fantastic!

    Reply
  15. Vitina says

    August 9, 2016 at 1:58 am

    How are you doing (sorry my poor language ! Beg 're pardon. I come from Belgium so French) Congratulations it's amazing. & your "feet" are so beautiful so these shoes are original. It's really a good idea …a GREAT idea & thanks for this "gift" . So cute & cheap "You 're a Great Designer" (belgian humor O.K. but these planters come from a very creatif brain ) Sympathy . Take care. Vi( On FB I've a page special Deco so I share there . )

    Reply
  16. Barhel says

    December 3, 2017 at 6:14 am

    Bonjour, j’aimerai savoir si on peut commander les pots de plantes en cuivre rosé ?

    Reply

Leave a Reply Cancel reply

Your email address will not be published. Required fields are marked *

About Photo
Welcome to Garvin & Co! So happy you're here! Grab a cup of coffee & look around. We hope you leave feeling happy & inspired!!

Get on the List

Look Around

  • Book Club
  • Chalkboards
  • Dinner Parties
  • Essential Oils
  • Festive
  • Friday Favorites
  • Gift Guides
  • Holidays
  • Homeschool
  • House & Home
  • Lake House
  • Monthly Edit
  • Motherhood
  • Playlists
  • Pregnancy and Newborn
  • Recipes
  • Skincare & Beauty
  • Style
  • Travel
  • Uncategorized

Shop the Goods

Search

Sponsors & Partners

jlgarvin

Need a fun & easy gift ideas for your kiddos teach Need a fun & easy gift ideas for your kiddos teachers? Throw together a color coordinated summer s’mores basket! You can find all of these items at your local grocery store & even add in a gift card (or a bottle of wine)! Also makes a great hostess gift for those Memorial Day weekend backyard hangs. 🤍
Forever obsessed with our new breakfast nook art b Forever obsessed with our new breakfast nook art by the one and only @where_is_frances !! She came all the way to Nashville so we could paint this together and I am beyond grateful!!! Not only is she so incredibly talented but she was so willing to encourage me and teach me so much. Such a genuine and fun human being, thank you Frances for this iconic experience and for making my walls so HAPPY!! Also, @garvin17 built this massive piece of framed wood for us to paint on AND this table & bench! 💪🏼 Now I need to find some new chairs and we will be finished.
More happy things pls. ✔️ More happy things pls. ✔️
Welcome to our garden! Found the cutest bistro set Welcome to our garden! Found the cutest bistro set to add to this fun outdoor space from @wayfair, sharing all the details on the blog! You can shop this set & lots of my other outdoor faves up to 80% off during the Way Day sale running April 26-27th! #sponsored #wayfair #wayday @collectivevoicehq
Easter 2023 🐰 Would like to point out that I di Easter 2023 🐰 Would like to point out that I didn’t find them any cute matching pajamas this year but they took it upon themselves to find some in their closets & dressed accordingly. They also surprised US with an Easter egg hunt around the house with recycled Easter eggs filled with hand written notes and coupons to cash in for hugs, compliments, etc. How did we get here?! The girls could hardly sleep Saturday night bursting with excitement to host our friends & neighbors for donuts in the morning, they were up before the sun ready to start setting the tables & rolling dough. For everyone reading this with babies & toddlers, just know that all of those sweet traditions you are creating will make a home in their hearts, and one day they’ll be the ones making the magic for you. 🤍🤍🤍
Our kitchen shelves are complete!! I was going to Our kitchen shelves are complete!! I was going to make you a reel but the thought of climbing up there to take this all down again was just too daunting. So you get a static post of the ultimate #shelfie 🤍 Swipe for before & afters, tap for sources!
Did your grandma ever make you a jello poke cake?! Did your grandma ever make you a jello poke cake?! They’re so fluffy and refreshing!! And always our girls birthday cake request! It’s too easy: make a white cake (from a box), poke holes in it with a toothpick, make jello according to directions in a saucepan and pour over top, and then put in the fridge for 3-5 hours to cool and set! Frost with whipped cream and serve chilled!!
  • Privacy Policy

Copyright © 2025 Garvin & Co · Theme by 17th Avenue