We built a desk! Or I guess Brandon built a desk, but either way, we are excited to share the DIY instructions because 1. desks are expensive, we built this one for under $250 and 2. this was super easy and we are positive that anyone can do it!!


Written by Brandon: There are dozens of way to build a desk or table. The approach I took is certainly not the most skilled, but is also a bit more advanced than my previous builds (primarily, and a bit excessively, work benches). My words of encouragement to anyone building a desk or table for the first time: 1) be patient, 2) use cheap wood and 3)remind yourself that if it doesn’t work out, you can always start over. Unlike a kitchen reno.
- Determine the size of the desk you’re going to build. We measured the space and wanted a desk large enough to fit two people working side-by-side, as well as take up a majority of the wall space. We initially chose 2 foot wide by 7 foot long. After some trouble finding wood long enough, we shrunk it down a foot to only be 2 foot wide by 6 foot long.
- Get your materials. We wanted to build our desk for under $250, so that limited material types. But since we were going to stain the desk (instead of using a boiled linseed oil or tung oil, which are designed to bring out the wood’s beauty) we decided to use poplar for the skirt and top. It’s worth taking a few minutes and finding the straightest boards you can. You can find some that are near perfect compared to grabbing some that are warped, crowned, etc. The top is made of two boards, each a 1”x12”x72” poplar board. Note: most boards marked as 1” are truly ¾” thick – which was true with the Poplar boards. The skirt (area connecting the legs together) is made of 1”x4”x72” poplar boards. 3.I ordered the legs at tablelegs.com. We chose the Large Hepplewhite Dining Table Leg (2.25” x 29”) in Maple. They have a wide variety of wood options, I chose maple as I thought it would reasonably match the poplar boards for the rest of the table.
- Prep the wood, fresh lumber always seems to have a few rough spots and splinters, which can be easily removed with 300 grit sandpaper and some elbow grease.
- Join the two 1×12 boards together to form your desktop. This time, I used a kreg jig and kreg jig right angle clamp to join all the boards and legs, forming the desk. There are a ton of great tutorials online as to how to use a kreg jig. I suggest practicing on some scrap wood if you haven’t used one before. I really liked this approach as it made the seam almost invisible. Not all edges are perfectly milled, I suggest laying out the two (or more) boards side-by-side in different arrangements (and even flipping them) to find the fit that makes the smallest seam.
- Additional sanding may be required. I was really happy with the seam, but it could still be felt with your hand. I ran a belt sander and 300 grit sandpaper over the seam until it was smooth. I then sanded down the rest of the table to make sure I didn’t carve out a valley over the seam while sanding.
- Router the tabletop edge, using a 1/8” roundover bit with bearing, I routered the entire edge of the table top. This was my first time using a router for a table edge, easier than anticipated, but I would recommend watching a few YouTube videos and practicing on some scrap wood if you are new to this.
- Build the table base. I built the base 4 inches smaller than the top, so the top would overhang 2” on all sides. The legs are part of the skirt (not tucked behind it), so you need to take into account the leg’s thickness when determining the length to cut the 1×4’s to form the skirt. (e.g. If the tabletop is 72” and you want a 2” overhang on each side, and each leg is 2 inches wide, then the board forming the skirt should be cut at 64”).
- Using the Kreg jig I drilled 2 holes at each end of the boards to secure to the table leg. Then, I drilled holes every 6 inches along the top of the skirt where it meets the table top. Next, I used the Kreg Jig clamp to secure the skirt boards to the legs forming the frame of the table. I chose not to have the boards flush against the front of the legs (as I was worried I wouldn’t be able to get it to line up perfectly). Instead, they’re centered on the leg.
- Attach the frame to the tabletop. Flip the tabletop upside down, center your frame and screw the base to the top! This part took about an hour (mainly making sure it was centered). I used the holes I drilled with my Kreg jig (along the inside of the skirt) to secure the frame to the top. Add additional support, I added three 1×6’s (running short ways) for additional support as this desk is very long and my kids are likely to climb//crawl//tap-dance on it.
- Prep and stain! For hard wood (like poplar and maple), it’s recommended to use a pre-stain conditioner to the wood, allow 15 minutes to absorb, then apply the stain. Honestly, I forgot this step and went right into staining. The risk is blotching and streaking on the wood. Which we do have a couple of small spots of, so I would recommend using the conditioner to avoid this. As I’m applying the stain, I keep a second rag handy to use to wipe off excess. After two coats of stain, and adequate drying time, you’re on to protecting the wood from water damage.
- Apply two coats of Polyurethane to the tabletop and you’re set. Poly is unique in that you don’t want it to fully dry before applying the second coat. You should apply the second coat 2-4 hours after the first. After 24 hours, it’s fully dry. Lastly, if there are any rough spots from the poly, then you can use 1400 grit sandpaper, or a brown paper bag, to sand it smooth.
- Crack a beer and enjoy! Husbands, this is the time where you can now ask for any ridiculous requests (new golf clubs, fishing trip, or even just a happy hour with a couple of buddies). Do not skip this step, it’s by far the most important.
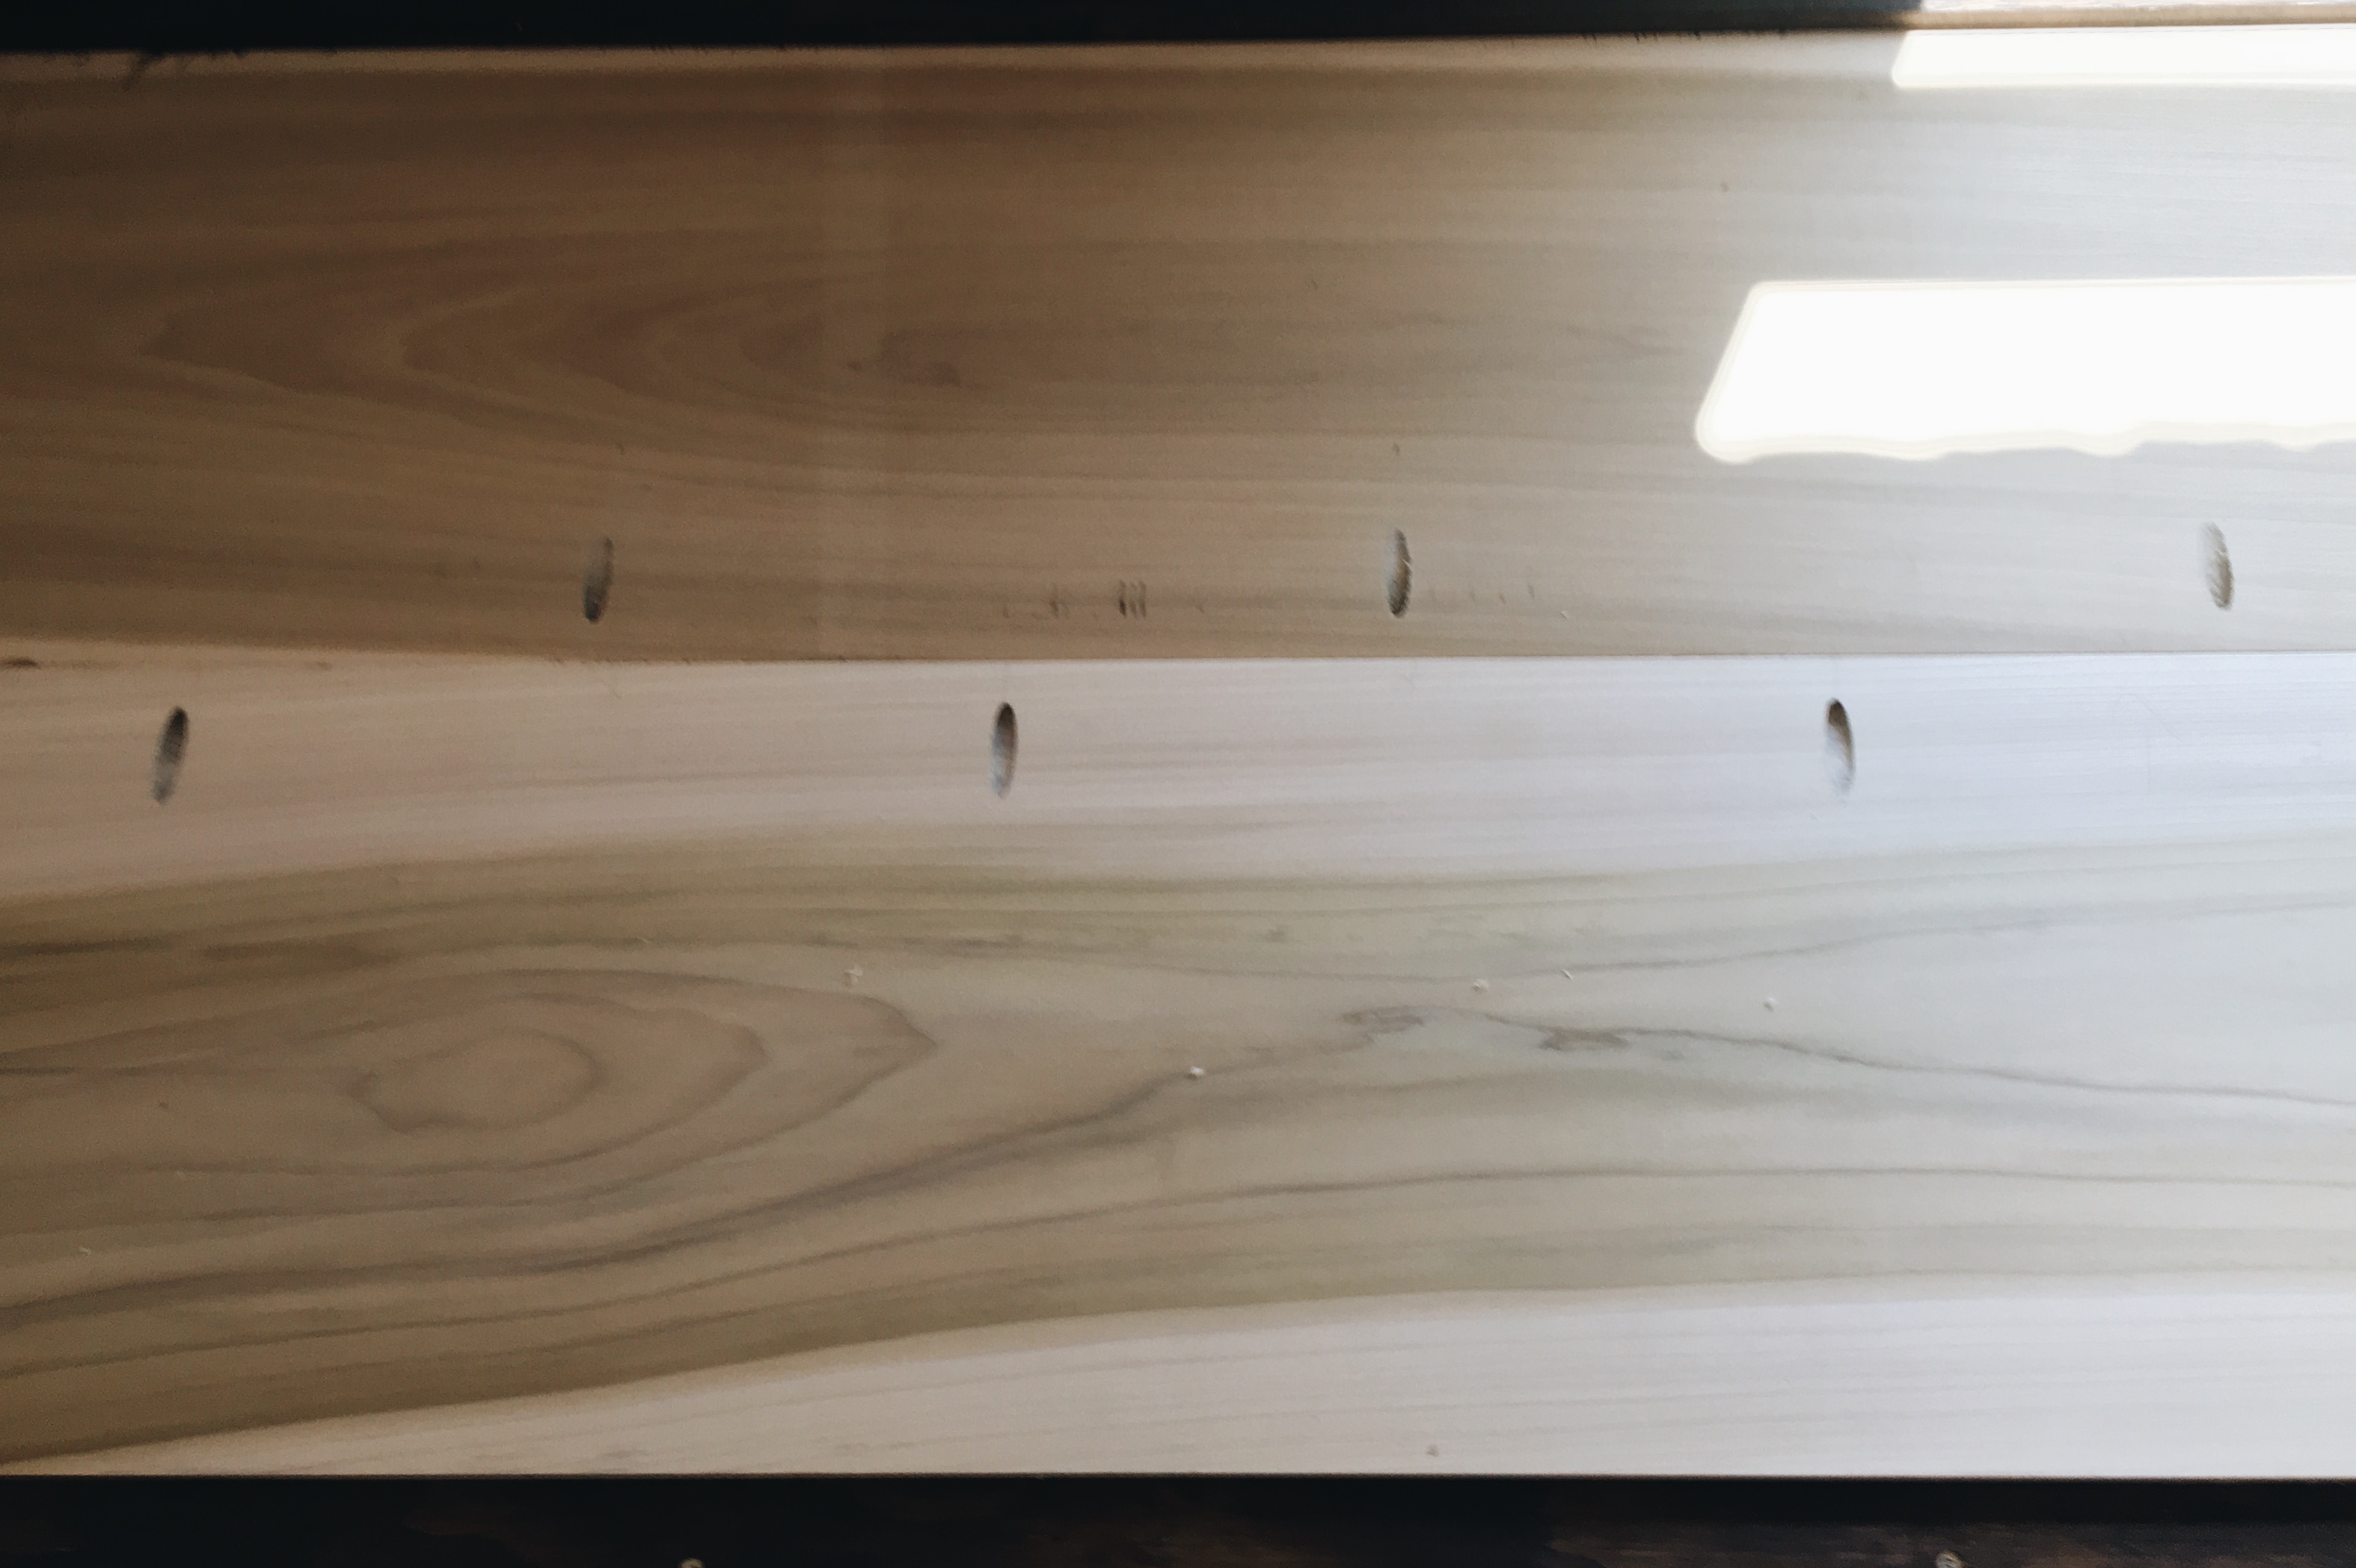
This is what the underneath side of the table top looks like with the holes formed from the kreg jig to secure the two sheets of wood to one another.
Next project, a new table for our breakfast nook. Turns out buying a 100 year old table for under $100 isn’t the best idea, my kids are obsessed with shoving scrambled eggs & cracker crumbs into the cracks of the table. Hope those instructions were helpful, let us know if you have any questions at all and we would be happy to help!! XO
PS. Our bed frame is from Ikea, it has been discontinued for a while but this is a super similar style that is also really affordable, I also love this one in white! And our light is the small Mia chandelier from PB. It is currently on sale, and I would put it in every room of the house if I could. 🙂
654
Well done Brandon! Looks great in your room!
Also the artwork above your bed is inspiring me to get some prints done of last years ski trips! haha
NO way! Y’all are so awesome, this desk is amazing! Sending this post to my hubby right now!
Brandon did a great job! It’s beautiful. <3
Your home is so inspiring! Thanks for all that you share with us! 🙂 So many great ideas… THANK YOU!
I just love how beautiful and classic your home is! I live in the desert so the bones of my home are really hard to turn into this clean classic vibe that I love. Awesome job on the desk, can’t wait to see it styled!
I love it! Great job B! I normally build our furniture but right now our house is under MAJOR renovations. I miss building so much and your post here gives me the itch again….but “no projects unti the renovations are finished Lura.”
Here is why no projects until after. Disaster zone over here. https://www.instagram.com/p/BW8M_d1hXVV/?taken-by=domesticability
Lura
x
I love it! Sending these plans to my husband right now, it’s exactly what I need!
LOVE!! I need to show this to my hubs too! I wish I was closer to you, I’d take that kitchen table in a heartbeat! 😉
Nice desk, I also made a desk for around 150$ by using an old door. I filmed it and placed it on youtube. What do you think from my minimal design? Personally I really am happy with it because it’s very practical and inspiring while designing stuff for my clients. https://www.youtube.com/watch?v=yw0S8dP_UoM
where did you get your bedframe
what color stain did you use?
are your walls and trim Chantilly lace?